|
AIRFLEX™
INSECT BARRIER
|
|
|
|
|
|
|
|
| Mesh
strips let fresh air in - keeps bugs out! |
|
|
|
|
|
|
|
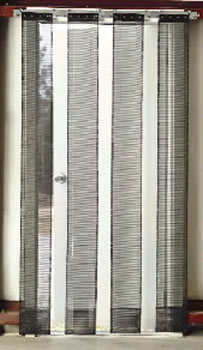
The
Airflex® strip door is ideal for high volume traffic locations
where
you want to let fresh air in and keep the bugs out. Mesh strips
are made
from 12 oz. PVC coated polyester for long life and durability. |
|
 |
|
|
|
|
|
|
|
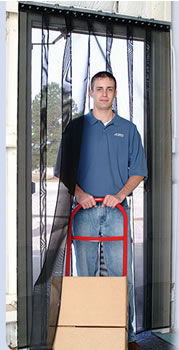
Strip
doors allow for hands free accessibility and can be easily
installed
using our patented MaxBullet® HTP mounting hardware. |
|
|
|
|
|
|
|
|
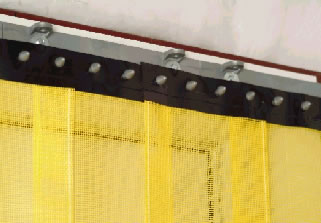
| Airflex®
is available in 8" wide Black or Safety Yellow strips.
|
|
|
|
|
|
|
|
|
|
 |
|
|
|
|
|
|
|
|
Available
in Black or Yellow
8" wide x 7' long or 8" wide x 8' long. |
|
|
|
|
|
|
|
Airflex®
Insect Barriers feature the patented MaxBullet™
HTP® Silver mounting hardware -the fastest strip door
mounting system in the world!
|
|
|
|
|
|
|
 |
|
Order
Online, by Phone, or by E-Mail |
|
|
|
~
Add items to your online shopping cart ~
Click a Part No. of the item
you wish to purchase.
|
|
|
|
|
|
|
|
|
Barrier
with Replacement Mesh Strips
|
|
Part Number |
Description |
Price |
|
|
7' 0 Mesh,
Black |
$51.45 |
|
|
8' 0 Mesh,
Black |
$58.71 |
|
|
7' 0 Mesh,
Safety Yellow |
$51.45 |
|
|
8' 0 Mesh,
Safety Yellow |
$58.71 |
|
|
|
Airflex™
Insect Barrier Installation Instructions
Using the MaxBullet™ HTP System
|
|
|
|
|
|
|
|
|
|
 |
|
TOOLS
NEEDED
• Pen or Pencil to Mark Drill Holes
• Drill
• Step Stool or Ladder
• Utility Knife to Cut Strips |
|
|
|
|
|
|
|
|
|
|
|
IMPORTANT |
|
Some
door models feature alternating clear PVC strips. Prior to
installation, unroll all door strips and place them on a clean,
flat
surface in a warm atmosphere for a minimum of twenty-four
(24) hours. This will allow the strips to return to their
original form. |
|
|
|
|
|
|
|
|
|
|
1.
Mount the MaxBullet™ hardware bracket in either the under |
|
|
|
|
header or wall position shown in Diagrams 1 and 2 using the
appropriate fasteners supplied. |
|
|
|
|
|
 |
|
|
|
|
|
|
|
|
2.
Press the door strips onto the “bullets” of the
hardware |
|
|
|
bracket
making certain that the concave sides are facing each
other. Attach strip numbers 1 and 3 (see Diagram 3) leaving
desired spacing between strips as indicated below (Diagram
4). |
|
|
|
|
|
|
|
|
3.
Attach strip number 2 over strip numbers 1 and 3 (Diagram
3). |
|
|
|
|
|
|
|
|
4.
Attach all of the remaining door strips in the same manner
as |
|
|
|
in
Steps 2 and 3. |
|
|
|
|
|
|
|
|
|
|
|
 |
|
|
|
|
|
|
|
|
 |
|
|
|
|
|
|
|
|
|
|
|
Airflex Insect
Barrier, Door, Doors, Impact Doors, Impact Traffic Door,
Impacdor, Insect Barrier, Flap-R-Door, Hatchery Door,
Rubbair Doors, and Traffic Doors from your source for material
handling equipment.
|
|